Knitters of the world, this post is for you. I give you a FREE PATTERN for a quick holiday knit. Fingerless mitts for the musician in your life (or anyone else who would like to have warm hands and free fingers.
A few weeks ago, a good friend of mine came up to me and asked if I would knit her a pair of these. The conditions were the following:
They had to be snug on her hands. As luck would have it, our hands are the same size (small) so this was not a problem.
They had to be warm.
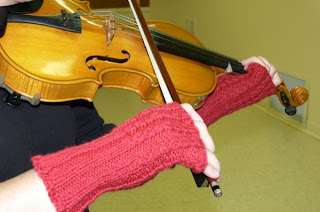
They had to be burgundy. Or another suitably rich colour.
And they had to be beautiful enough to make the other fiddlers jealous.
You be the judge of that.
Johanne’s Fiddle Mitts
Pattern by: Jennifer Hoy
© All 9 Muses
Pattern by: Jennifer Hoy
© All 9 Muses

These mitts are inspired by cold practice halls. Music warms the soul, but it takes time and effort. While waiting for the sweet strains to reach your hands, these mitts will allow you to keep your fingers on the strings without dropping your instrument!
These are lovely, stretchy mitts.
These are lovely, stretchy mitts.
Size: Women’s small. To make larger mitts, go up in your needle size or switch to chunky yarn.
Finished Measurements: 7 inch hand circumference
Materials:
Patons Décor Burgundy
*My model is allergic to wool. If you wish to use 100% wool, pick your favourite worsted weight.
Needles: 3.75 mm
· Safety pin or stitch holder for thumb stitches
· Tapestry needle
Gauge: 6 sts/inch in stocking stitch
Notes
m1L by lifting loop between the stitches from the front, knit into the back of loop
m2R by lifting loop between the stitches from the back, knit into the front of the loop
Pattern sts: These mitts use a pattern with a 4 row repeat.
Row 1: k2, p2 (repeat to end of round)
Row 2: k1, mk 1*, k1, p2 (repeat to end of round)
Row 3: k3, p2 (repeat to end of round)
Row 4: sl 1, k2, psso, p2 (repeat to end of round)
*mk1 by inserting your needle from back to front in the ladder of the row below and knit into the back of the needle.
Pattern
Cast on 36 sts. Being careful not to twist the stitches, join work and k2, p2 until work measures 4 inches.
Start pattern
Row 1: k2, p2 (repeat to end of round)
Row 2: k1, mk1, k1, p2 (repeat to end of round)
Row 3: k3, p2 (repeat to end of round)
Row 4: sl 1, k2, psso, p2 (repeat to end of round)
Start Thumb Gusset. This thumb gusset is knit in between the first purl sts. While continuing pattern, start the thumb on the next row like this…
Row 5: k2, p1, m1R, *p1, k2, p2 (repeat from * to end of round)
Row 6: k1, mk1, k1, p1, k3 p1, *k1, mk1, k1, p2 (repeat from * to end of round)
Row 7: k3, p1, m1R, k3, m1L, *k3, p2 (repeat from * to end of round)
Row 8: sl1, k2, psso, p1, k5, p1, * sl1, k2, psso, p2 (repeat from * to end of round)
Continue doing this until there are 9 sts in between the first purl sts of the round.
Next row: sl1, k2, psso, p1, slip 9 sts for thumb onto a safety pin, cast on 5 sts, p1, * sl1, k2, psso, p2 (repeat from * to end of round)
Continue pattern sts until the mitt measures 7 inches
K2, p2 for ½ inch
Cast off in rib.
Thumb: Transfer 9 stitches from the pin onto two needles. Pick up and knit 5 sts along the top of the thumb.
Knit 5 rounds.
Cast off. Weave in the ends and darn up the holes at the base of the thumb (I can’t be the only one who gets these!) and play on!

Now, this is my first published pattern. If you find errors, let me know in the comments.
This pattern is for personal use only. I will post the pdf in the side bar. Just as soon as I figure out how.
No comments:
Post a Comment